Spookify Your Home with These Halloween Decorating Ideas
- Admin Admin
- Oct 3, 2025
- 6 min read

October is here, and that means one thing — it’s time to transform your home into a spooky, festive haven for Halloween! Whether you’re planning a neighborhood party, welcoming trick-or-treaters, or simply want to get into the spirit of the season, a few decorating tricks (and treats!) can turn your home into the talk of the block.
At Top to Bottom Services, we love helping homeowners across Camden, Lugoff, Elgin, and Kershaw County prepare their homes for every season. From handyman touch-ups to cleaning services that give your home a fresh slate, we’re here to make decorating easier, safer, and a whole lot more fun. Here are some creative ways to “spookify” your space this October.
Start with a Clean Slate
Before the cobwebs (real or fake) go up, it’s smart to give your home a quick refresh. A clean entryway, swept porch, and clutter-free living room make your Halloween décor pop even more. Our cleaning team can help tidy up guest areas so you can focus on the fun of decorating instead of stressing about dust bunnies and smudges. Schedule your seasonal clean here.
Create a Show-Stopping Front Porch
Your porch is the first thing neighbors and trick-or-treaters see, so make it count:
Pumpkins Galore: Mix carved jack-o’-lanterns with painted pumpkins for variety.
Haunted Lighting: Swap porch bulbs for orange or purple hues, or add flickering lanterns.
Creepy Accents: A spooky wreath, fake cobwebs, or a skeleton in a rocking chair all set the tone.
Make Your Carved Pumpkins Last Longer
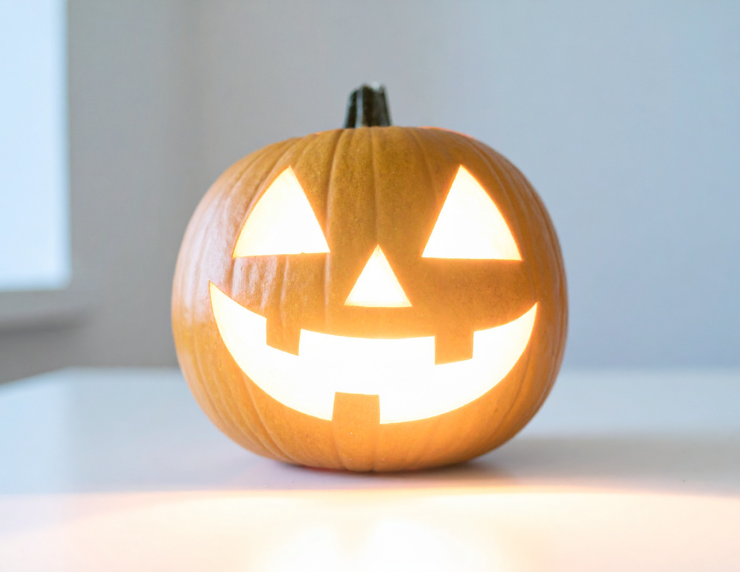
Want to carve pumpkins early, but worried they’ll rot before Halloween? Here’s a few tips to make your carved pumpkins last longer:
Clean out fully — remove all pulp and scrape walls thin but even.
Soak in a bleach solution (1 Tbsp bleach per quart of water) for 10–20 minutes, then air dry.
Rub cut edges with petroleum jelly or vegetable oil to slow dehydration.
Keep pumpkins shaded and use LED lights instead of candles.
Reapply bleach soak or oil layer every few days if needed.
Take the Spooky Inside
Don’t stop at the porch — bring the Halloween fun indoors, too. Some easy ideas include:
Themed Centerpieces: Fill glass vases with candy corn or faux spiders for your dining table.
Mood Lighting: Swap lampshades or bulbs for warmer tones that create a cozy, eerie glow.
Painted Pumpkins: Spruce up your inside decor with painted pumpkins.
If you’re hosting a Halloween party, our cleaning services can help get your kitchen, bathrooms, and living spaces guest-ready before and after the big night.
DIY Painted Pumpkin Tutorial

Time: 30–60 minutes (plus drying time)
Difficulty: Easy to Moderate
Great For: Kids, families, or anyone wanting chic no-carve pumpkin décor
Supplies You’ll Need
Real or faux pumpkins (plastic foam pumpkins work great for reuse)
Acrylic craft paint (matte or satin finish works best)
Paintbrushes (foam brushes for base coats, fine brushes for details)
Painter’s tape or stencils (optional, for patterns)
Paper plates or paint palette
Cup of water & paper towels for rinsing brushes
Sealant spray (matte, gloss, or glitter finish depending on style)
Drop cloth or newspaper to protect your work area
Step 1: Prep Your Pumpkin
Clean the pumpkin — wipe with a damp cloth to remove dirt and dust. For real pumpkins, dry fully before painting.
Optional base coat — apply a thin coat of white acrylic paint or spray primer to help colors pop (especially on orange pumpkins). Let dry completely.
Step 2: Choose a Style
Here are three trendy painted pumpkin styles with step-by-step directions:
1. Classic Chic — Solid & Metallic
Perfect for a modern, elegant look.
Paint the entire pumpkin in one solid color (black, white, cream, or navy look striking).
Let dry, then add a second coat for full coverage.
For the stem, use metallic gold, silver, or copper paint to create contrast.
Seal with a clear gloss spray for a shiny, ceramic-like finish.
2. Pattern Play — Stripes, Polka Dots, or Chevron
Adds a playful, whimsical vibe.
Paint the pumpkin a solid base color and let it dry.
Use painter’s tape to create stripes or chevrons, or use stencils for polka dots.
Paint over with a contrasting color (black & white, orange & gold, navy & silver).
Remove tape/stencil carefully before fully dry to prevent peeling.
Touch up edges with a small brush if needed.
3. Spooky-Cute — Silhouettes & Faces
Halloween-ready without carving!
Paint pumpkin a light base color (white or pale gray works great).
Using black acrylic paint (or a paint pen), draw and fill in spooky silhouettes — bats, cats, witches, or haunted houses.
For a classic Halloween look, paint fun jack-o’-lantern faces instead of carving.
Seal with a matte spray for a smooth finish.
Step 3: Seal & Protect
Once your design is dry, spray with a clear acrylic sealant to protect it from scratches, moisture, and chipping.
For outdoor pumpkins, use an outdoor-rated sealer to withstand weather.
Step 4: Display
Place on porches, mantels, entryways, or as part of your dining table centerpiece.
Add fairy lights or lanterns nearby for an extra cozy autumn vibe.
Extra Tips
Kids’ version: Use washable paints, stickers, or markers for a mess-free alternative.
Glitter pumpkins: Paint solid color, brush on a thin layer of glue, and sprinkle glitter over the top.
Chalkboard pumpkin: Paint with chalkboard paint, then decorate with chalk drawings you can change anytime.
Ombre effect: Blend two or three shades of the same color (light at the top, darker at the bottom) for a gradient look.
Outdoor Displays for Maximum Impact
If you want to go all out this October, a dramatic yard display will wow your neighbors. Try:
DIY Floating Ghosts Decorations: White fabric, fishing line, and festive ribbon create the perfect haunted scene.
Inflatables & Animatronics: Ghosts, ghouls, or giant spiders add plenty of spooky fun.
Pathway Lighting: Glow-in-the-dark stones, pumpkin lanterns, or LED candles safely guide trick-or-treaters to your door.
Our handyman team can help secure decorations, repair fencing, or even hang string lights to keep your setup safe and sturdy. Just reach out here.
DIY Floating Ghosts Tutorial

Time: ~15–30 minutes per ghost
Difficulty: Easy
Makes: 1 hanging ghost (scale up as needed)
Materials
White fabric: cheesecloth, lightweight muslin, old white sheets, or polyester gauze (cheesecloth gives the wispy look)One round form for the head: foam craft ball, small beach ball, or paper lantern (4–8" diameter recommended)Ribbon, twine, or string (the orange ribbon in the photo is optional for a pop of color)Fishing line, clear nylon string, or outdoor twine for hanging
Black felt, vinyl, permanent marker, or black craft paint for eyes
Hot glue gun or fabric glue (optional)
Scissors
Wooden stake, rebar, or shepherd’s hook (if making a yard/ground version)
Optional: battery-operated LED tea light or a short string of battery fairy lights
Step by Step Directions:
Prep the Head Form
If using a beach ball, inflate it to desired size. Use a foam ball as is. Paper lanterns can replace the ball for a lightweight look.
Drape the Fabric
Lay your fabric flat and center the round head on the fabric. For a fuller skirt, use a larger square or layer two pieces (cheesecloth over a sheet gives texture).
Create the Neck
Gather the fabric snugly under the head to form a “neck.” Secure it with ribbon, twine, or a rubber band. Tie a decorative ribbon over the tie for a finished look.
Attach a Hanging Line
Tie a loop of fishing line or clear nylon to the top of the head—either around the ribbon or with a small pushpin/needle through the ball (if foam). For paper lanterns, use the built-in hook.
Make sure the knot is secure and weight-tested before hanging.
Add Eyes & Face
Cut simple eye shapes from black felt and glue them on, or draw faces with a permanent marker or fabric paint. Felt is more durable outdoors than marker.
Optional Lighting
Tuck a small battery LED tea light or a short string of fairy lights under the head (inside the skirt) to make the ghost glow at night. Tape or tie the battery pack to the neck area so it’s secure. Never use real candles.
Hang & Arrange
Use the fishing line to hang the ghost from tree branches, porch eaves, shepherd’s hooks, or a pergola. Hang at various heights for depth and movement. Anchor long lines to avoid swaying into walkways.
Safety First for Spooky Nights
While Halloween décor is all about fun, it’s also important to keep things safe for guests and trick-or-treaters. A few quick fixes make a huge difference:
Repair loose steps or railings on your porch.
Add non-slip mats for entryways.
Ensure walkways are well-lit to prevent tripping hazards.
These little updates not only keep visitors safe but also give your home a polished, well-cared-for look. We’re happy to help secure your house for trick-or-treaters, just reach out here.
Let’s Make This October Spooktacular
From small touches like swapping out lightbulbs to full yard displays that stop traffic, Halloween decorating is all about creativity and fun. Whether you need handyman services to help hang, repair, or prep, or cleaning services to give you a blank canvas, Top to Bottom Services is here to help.
📞 Call us today to schedule your October handyman or cleaning services in Camden, Lugoff, Elgin, Lake Wateree, or anywhere in Kershaw County — and let’s get your home Halloween-ready!


Comments